Light Trails in Photography
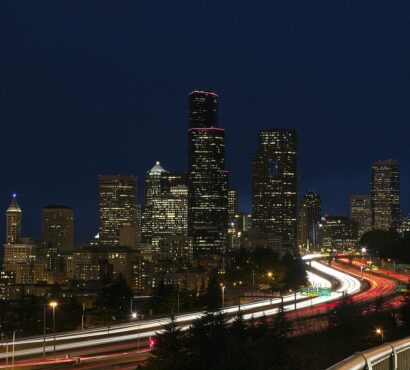
One of the coolest images that’s always fascinated me in photography are light trails, like below.
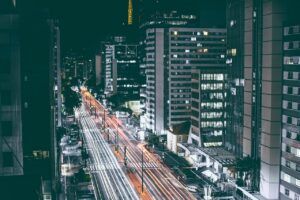
At first glance, it looks like a an unknown moving at such a fast speed, or the speed of light (well, not really – but it reminds me of the effect from Star Trek, when the Enterprise travels at warp speed and leaves a similar light trail behind)
These aren’t starships or space crafts in this image, but passing cars, and they’re not traveling at a very high speed, but more around 35-40 miles per hour.
The trick here is that the photographer’s camera has managed to let in more light through a longer exposure, which results in these colorful streaks from the car’s headlights and taillights, depending on the angle. By adjusting the shutter speed on your digital camera or even your smartphone, they can create some incredible images in photography.
How does Shutter speed create a light trail?
If I lower the shutter speed on my camera to a much lower level, that means the shutter is open for a longer period of time. During the length of this time, the sensors will track everything during this duration. So when a moving object, such as a passing vehicle enters and leaves the frame, the sensor captures and records the light as it passes over the length of the frame.
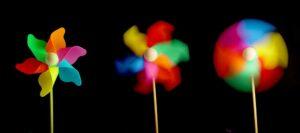
In contrast, a higher level on the shutter speed means that the sensor will only capture everything in the frame in a quicker time as a fixed point. But in this case, the longer duration, leads to longer streaks of light.
Capturing Light Trails with your Camera
Here was my first attempt at capturing these effects, using my Nikon D3200 dslr, about an hour after sunset.
When I first approached this, I basically prepared myself for night photography, bumping up my ISO to about 1600 to test the lighting out first. I then adjusted my aperture down to f/10, brought my ISO down to 400 while raising the level of my shutter speed to 15 seconds. After switching my release mode to the self-timer of 10 seconds, I was ready to start shooting, alongside a highway of evening traffic.
Since this is my first attempt, I’m not really concerned about getting the best shot, as much as I am in just getting it to work properly. I’ll be the first to admit to struggling with over exposure and a long shutter speed in my earlier attempts at this. But now with a little practice, I should be able to pull this off.
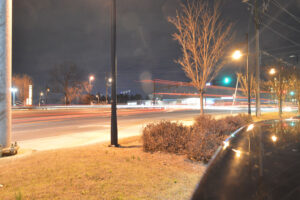
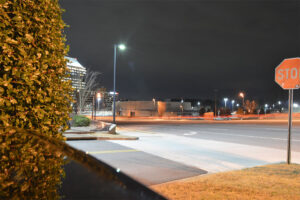
It’s a bit too bright. I’m able to produce an effect – but it could be better. Also, when practicing a new technique, I only take images in JPEG over RAW format.I understand the advantage of shooting in Camera Raw. The image quality is much better when shooting in Raw vs JPEG and when it comes to post editing, Camera RAW is better to work with in such programs as Adobe Photoshop.
But, at this stage, I don’t plan on doing much editing as I’m interested in practicing and taking as many shots as I can until I can master this skill set. I also discovered that JPEG is not only faster when saving images to my memory card, but they also take up little space if I’m constantly shooting hundreds of images, with only a few that I may decide to keep.
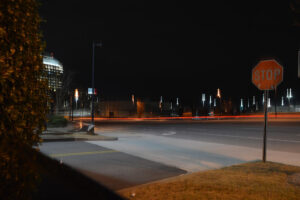
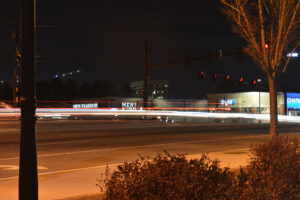
After bringing the ISO down from 400 to 100 and lowering the shutter speed from 15 seconds to 10 seconds, the results started to improve.
My next steps are to practice more often with technique, by going to different locations, setting up my camera on a tripod at different angles and trying different settings with my shutter speed. But the key for me is to keep practicing – keep taking photographs – hundreds of them if I need to, until I’m able to master this technique.
There you have it everyone – the quickest way to begin creating Light Trails in Photography. Let me know what you think in the comments below.
Thanks!


4 Comments
drinkteahub
This is a really informative article. Like you, I’ve always found light trail photographs fascinating and wondered how they were done and whether the only way was some sort of CGI. But then I saw light trail photos from the 1960s so knew it couldn’t be that. Your article not only explains it all, but also gives some really practical tips as to how to go about doing it. Thanks for sharing.
Isaiah Burch
Great! I’ve always wondered about how these amazing effects were achieved too. Glad you found the article helpful in explaining his technique. Thanks for stopping by.
Benny
Hello, I really want to first appreciate your effort in putting this great website together and writing this article. the enlightenment you have given is on professional level. now photography has just become more interesting after understanding everything you have outlined. thank you very much for this post. it is really helpful
Isaiah Burch
Thanks for the valuable feedback, Benny! I’ll do my best to keep providing valuable information.