Using my DSLR Camera: So where do I begin?

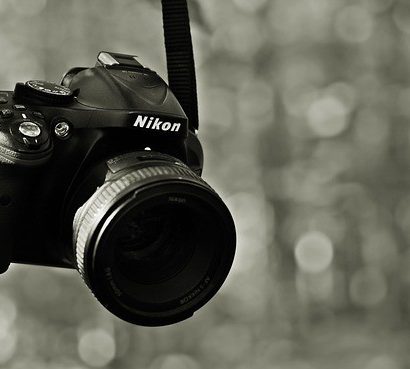
As part of my Graphic Design studies, I was introduced to the field of photography and had to purchase my first DSLR camera. After a lot of window shopping and research on where to start and which brand name to go with, I decided on an entry level camera – a Nikon D3200 with 18-55mm VR lens – which I managed to find on EBay at a great deal.
I remember the day that it arrived in time for my online classes how excited I was, not only to start using my first digital camera, but to learn a new skill. The first question I asked myself, was “Where do I begin?”
The Camera Manual
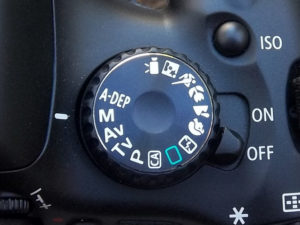
This should be a no brainer for everybody, especially when you first order something online, have it arrive at your front door, and tear open the package. I scan through a few sections, like the introduction, naming every last part, the power switch, mode dial, viewfinder, etc. As this is a great reference, with brief explanations on how to get started, a few more examples for a newbie like myself couldn’t hurt, like some hands-on videos.
When in doubt, consult with Google
As anxious as I am to start taking photos, I’m still a little cautious. I’m sure there are some individuals who are comfortable with just removing the body cap, turning on the power button and just start impulsively snapping photos right away. But me? I’m sort of the opposite – I’m excited, yet I want to know that I’m doing things right before I go picking up camera and start pressing random buttons. And I personally like a little encouragement with each step along the way. That’s why I went straight to Youtube and Google, searching on “DSLR Cameras for beginners” or “Nikon Digital SLR D3200 for beginners”, where I found a wealth of videos that assisted me out with taking my first photographs.
Try the other modes besides “Auto”
Everybody needs to start somewhere, and the “Point and Shoot” method for me in Auto mode was perfect for not only taking my
first shots with a digital camera, but also get a feel for the camera, how to hold it properly, in different orientations, relying on
only the viewfinder and zooms lens to frame my subject.
But there came a time when I had to make that leap from Auto to Manual mode and open myself up to a new realm of possibilities on adjusting my own images based on the surrounding environment. Daytime shooting, Night time shooting, overcast, back light, moving objects, and many more factors now come into play. This was the time to start practicing and learning about how to adjust for these different elements.
Understanding the different photography terms

Here are some of the terms I feel it is necessary to get up to speed on:
Can’t afford to hire a model?
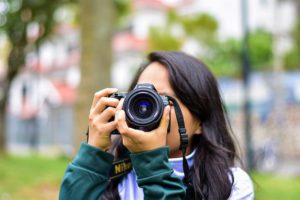
I discovered that I don’t necessarily need to hire a professional model – that the surrounding people will work perfectly. When I get outdoors and capture individuals from afar, in a group, or perhaps up close, with their permission of course. There are plenty of opportunities for taking great photos:
Family, friends, neighbors, pets – Most people don’t mind having you take their photos. There are a few who might turn you down, because they’re “camera shy” or they want to fix themselves up before hand.
Still Life – Random objects around the house can work, and the best part? They’ll never say no to you! Fruit from the refrigerator, dishes, bowls, furniture, decorations that you can set up in the right spot with the right lighting. Afterwards, I can  even do a little manipulating or tweaking in Adobe Photoshop if there’s something that didn’t quite come out right, like sharpness, contrast with the curves tool, or additional touches with the filters.
Self Portraits – With the Self Timer and Remote Control Modes – this allows you to take your own “selfies”, but with more precise adjustments.
Landscapes – The best part about this is that is can be taken anytime and anywhere in any season, whether you’re in a suburban cityscape or rural landscape – particularly as sunset or sunrise when your’e attempting to capture the right mood and lighting.
Practice Taking photos all the time
I found the best way to improve my skills and get better as a photographer was to take have my DSLR camera with me at all times. Like an artist, having his pencil and sketchbook with him in his book bag, I started charging my Lithium battery every night and  packing my camera case in the trunk of my car on a regular basis. This motivates me to get into the habit of not only using my camera on a regular basis so that the settings and different functions become second nature, but I also started to develop a keen eye. Sometimes, while I’m walking, driving, or running, I’ll notice a landmark, a landscape, a couple walking their dog, or a particular subject, and start to make mental notes on how I would frame that shot, where would I position the rule-of-thirds, or the lead-in line?
I’m not saying that I’m obsessed with taking pictures every time I’m out and about, but I have found little tricks like this helpful in my learning process.
I would be interested to hear everybody’s thoughts on this. Thanks!


3 Comments
Michal Svoboda
Hello there Isaiah, taking photos all the time is good for the practice get used to your artistic instrument, but at certain point a question pops up: “what do you want to say by taking this photo?” “Who you want to reach with it?” I used to photograph a lot for many year and in the end I burned out…it took almost five year when I came back to the photography and I bought Fuji X100F, a small tool, no objective changes, fixed lens that makes me walk, be closer to people… and still I am not sure about the answers I mentioned above anyway it makes me happy again, it is fun… and when I see my photos, I know I do them mainly for myself, without compromises … they show me what really interests me … it is the people, hard light and deep shadows, whole world simplified into black & white. So I just want to tell you that I’m a fan of what you do (I’ve read your story), go on, keep doing what you like and persevere. The reward will come sooner or later.
Take care!
George...
Hi,
I love photographing as well. The difference may be that I use the Nikkon F4 which has been very popular (and VERY expensive) in the 1990ies. 🙂 It’s an analogue camera and I sometimes even take DIAs with it. Love it! 🙂
Your tips are great! I also photograph according ot the “Golden Cut” – pretty similar to the “Rule of Thirds”.
Hope you will have a lot of fun with providing tips here – I’ll curious to get new clues!
Thanks,
George
Ali Monajemi
What a nice post you wrote! I really enjoyed reading it and I could not be silent about your post so I decided to leave my comment here and say Thank You! For sharing this quality post with others.
Actually this is exactly the information that I was looking for information about the DSLR of the camera and how to use it and when I landed on your website and read this post, it answered all my questions in details.
So I’m happy that you decided to write about this topic and share it with people. It’s very useful and can definitely be used as a great source for everyone who is interested in this topic.
I will come back to your website again for sure and I’m looking forward to reading your new posts.)
Thanks!